Mega Man was my inspiration for the lab this week.
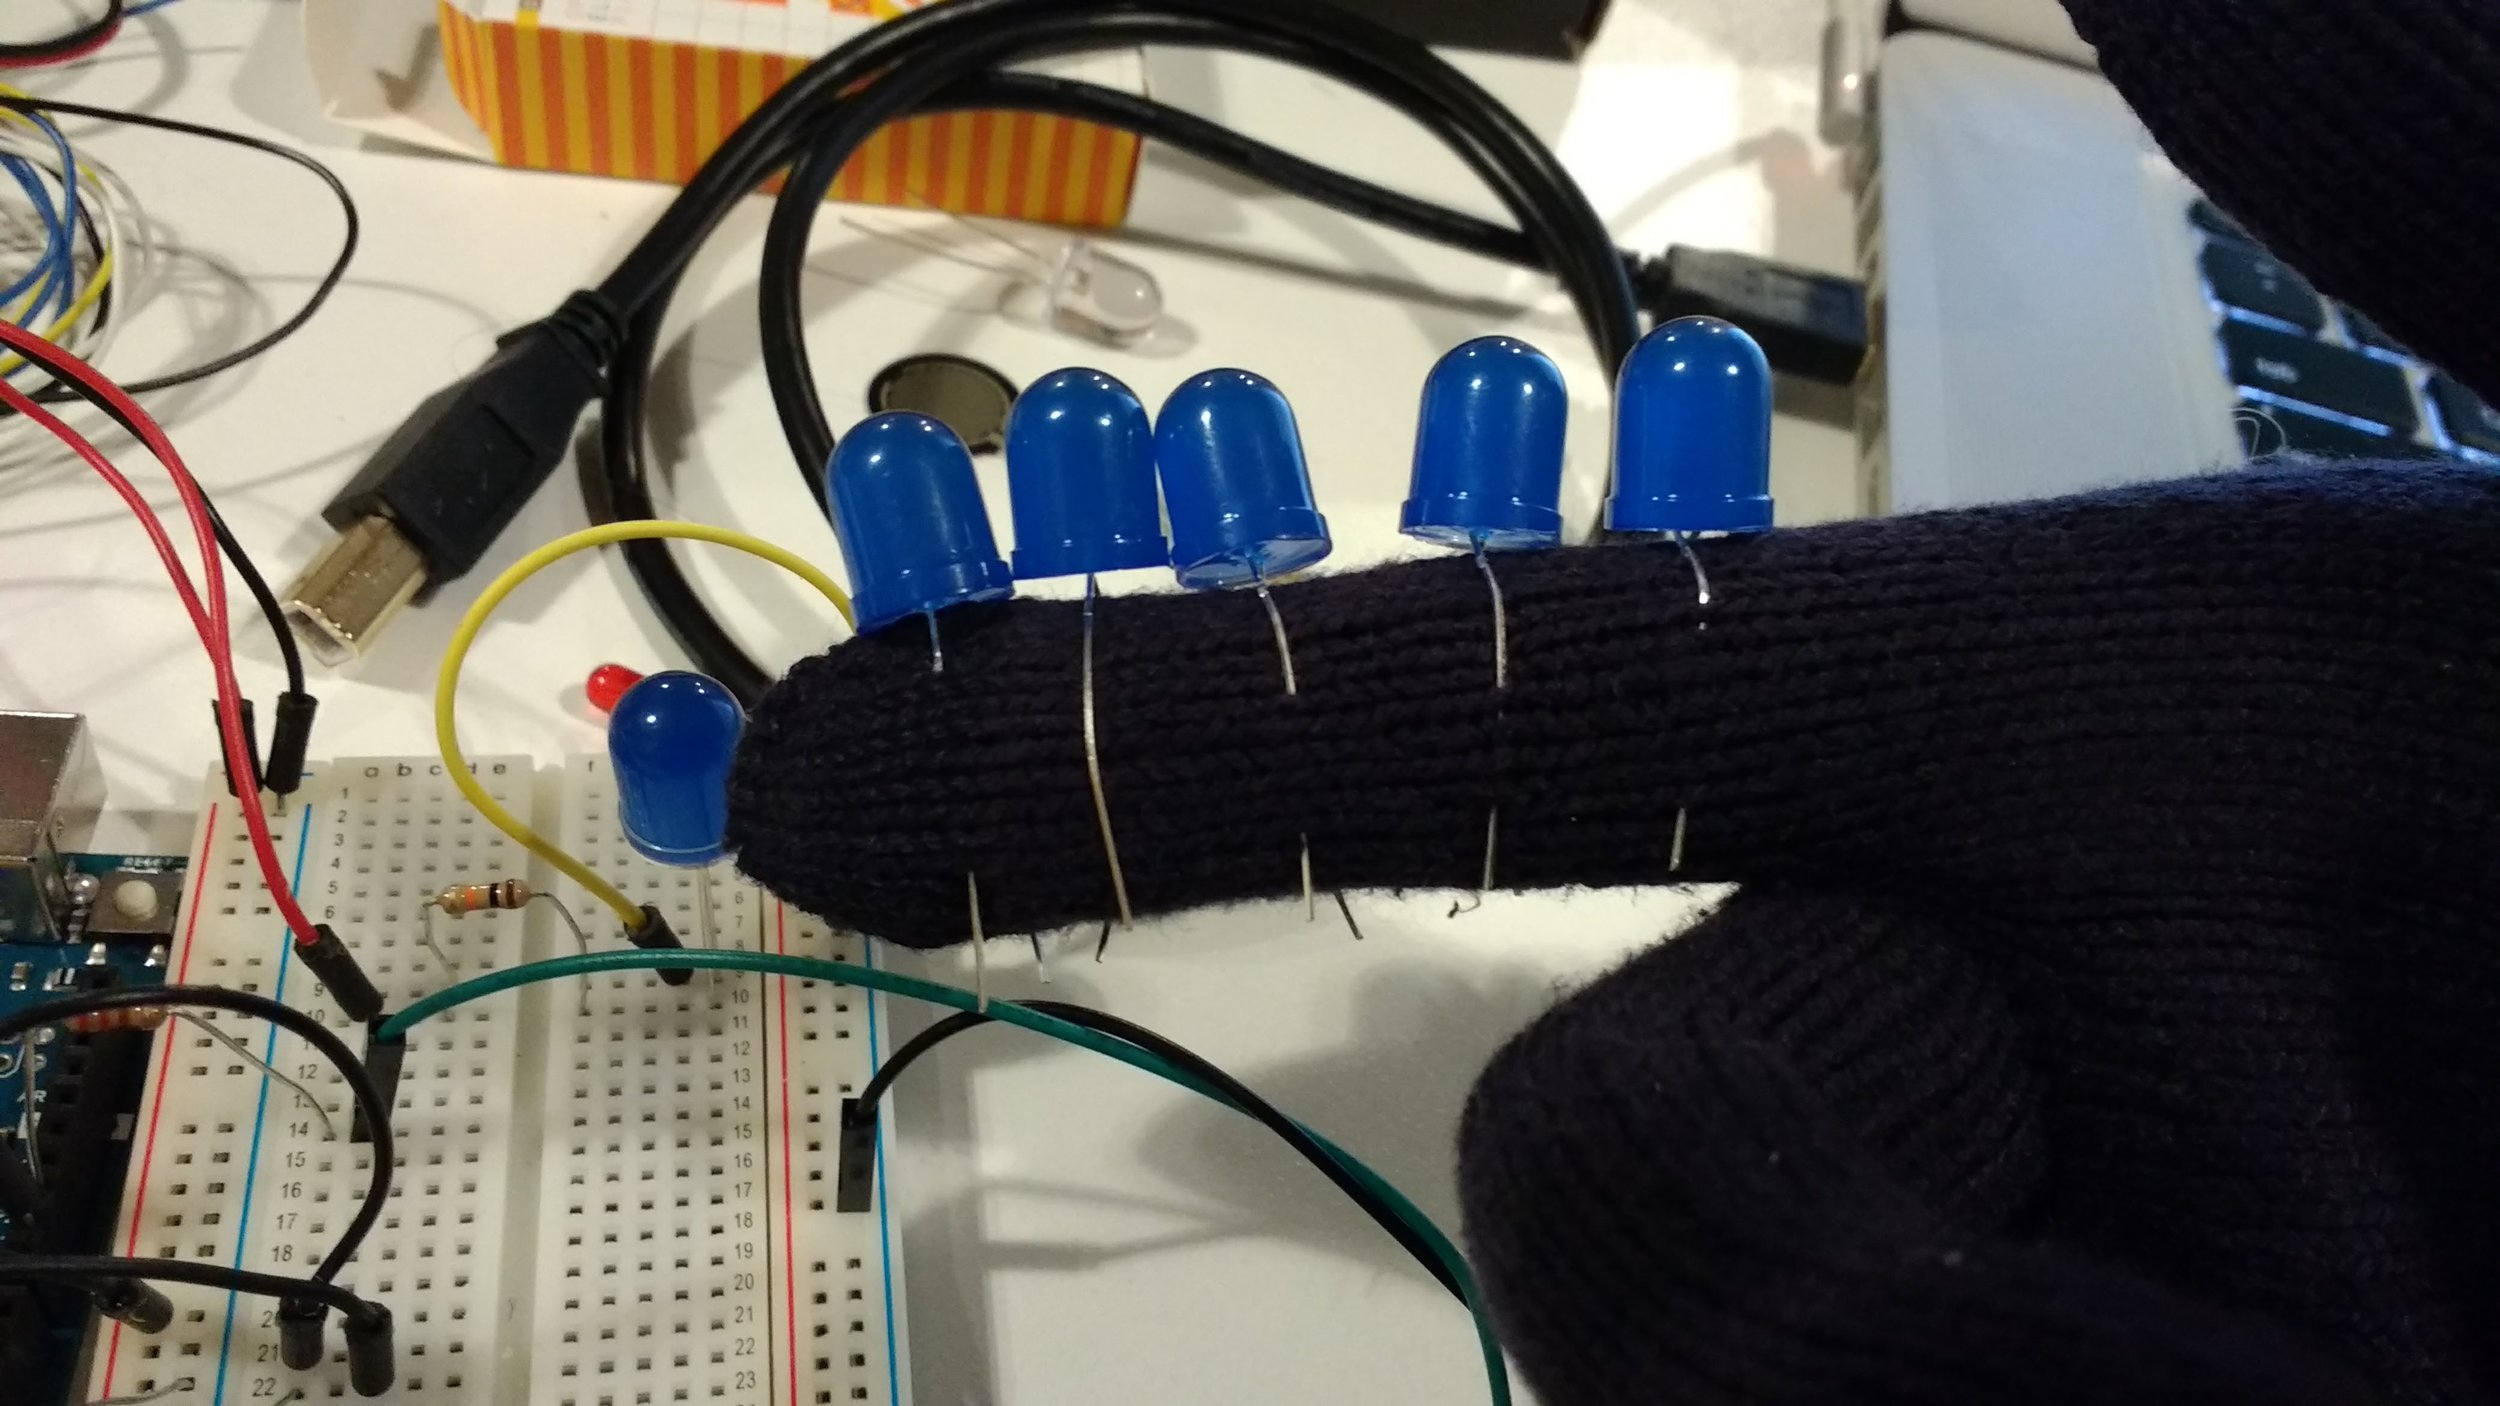
During last week's class, the analog sound output reminded me of Mega Man's charge shot sound effect. So I decided to create a toy that kind of replicates all of the functionalities of Mega Man's blaster... sans the blaster part. I had some old gloves lying around, so I figure I'd use that as the form for my project.
I sat and stared at my hand for longer than I would have liked. It was very difficult for me to wrap my head around designing the circuit around my glove. After wrecking my brain for a good half hour, I decided to set up the project on my breadboard first.
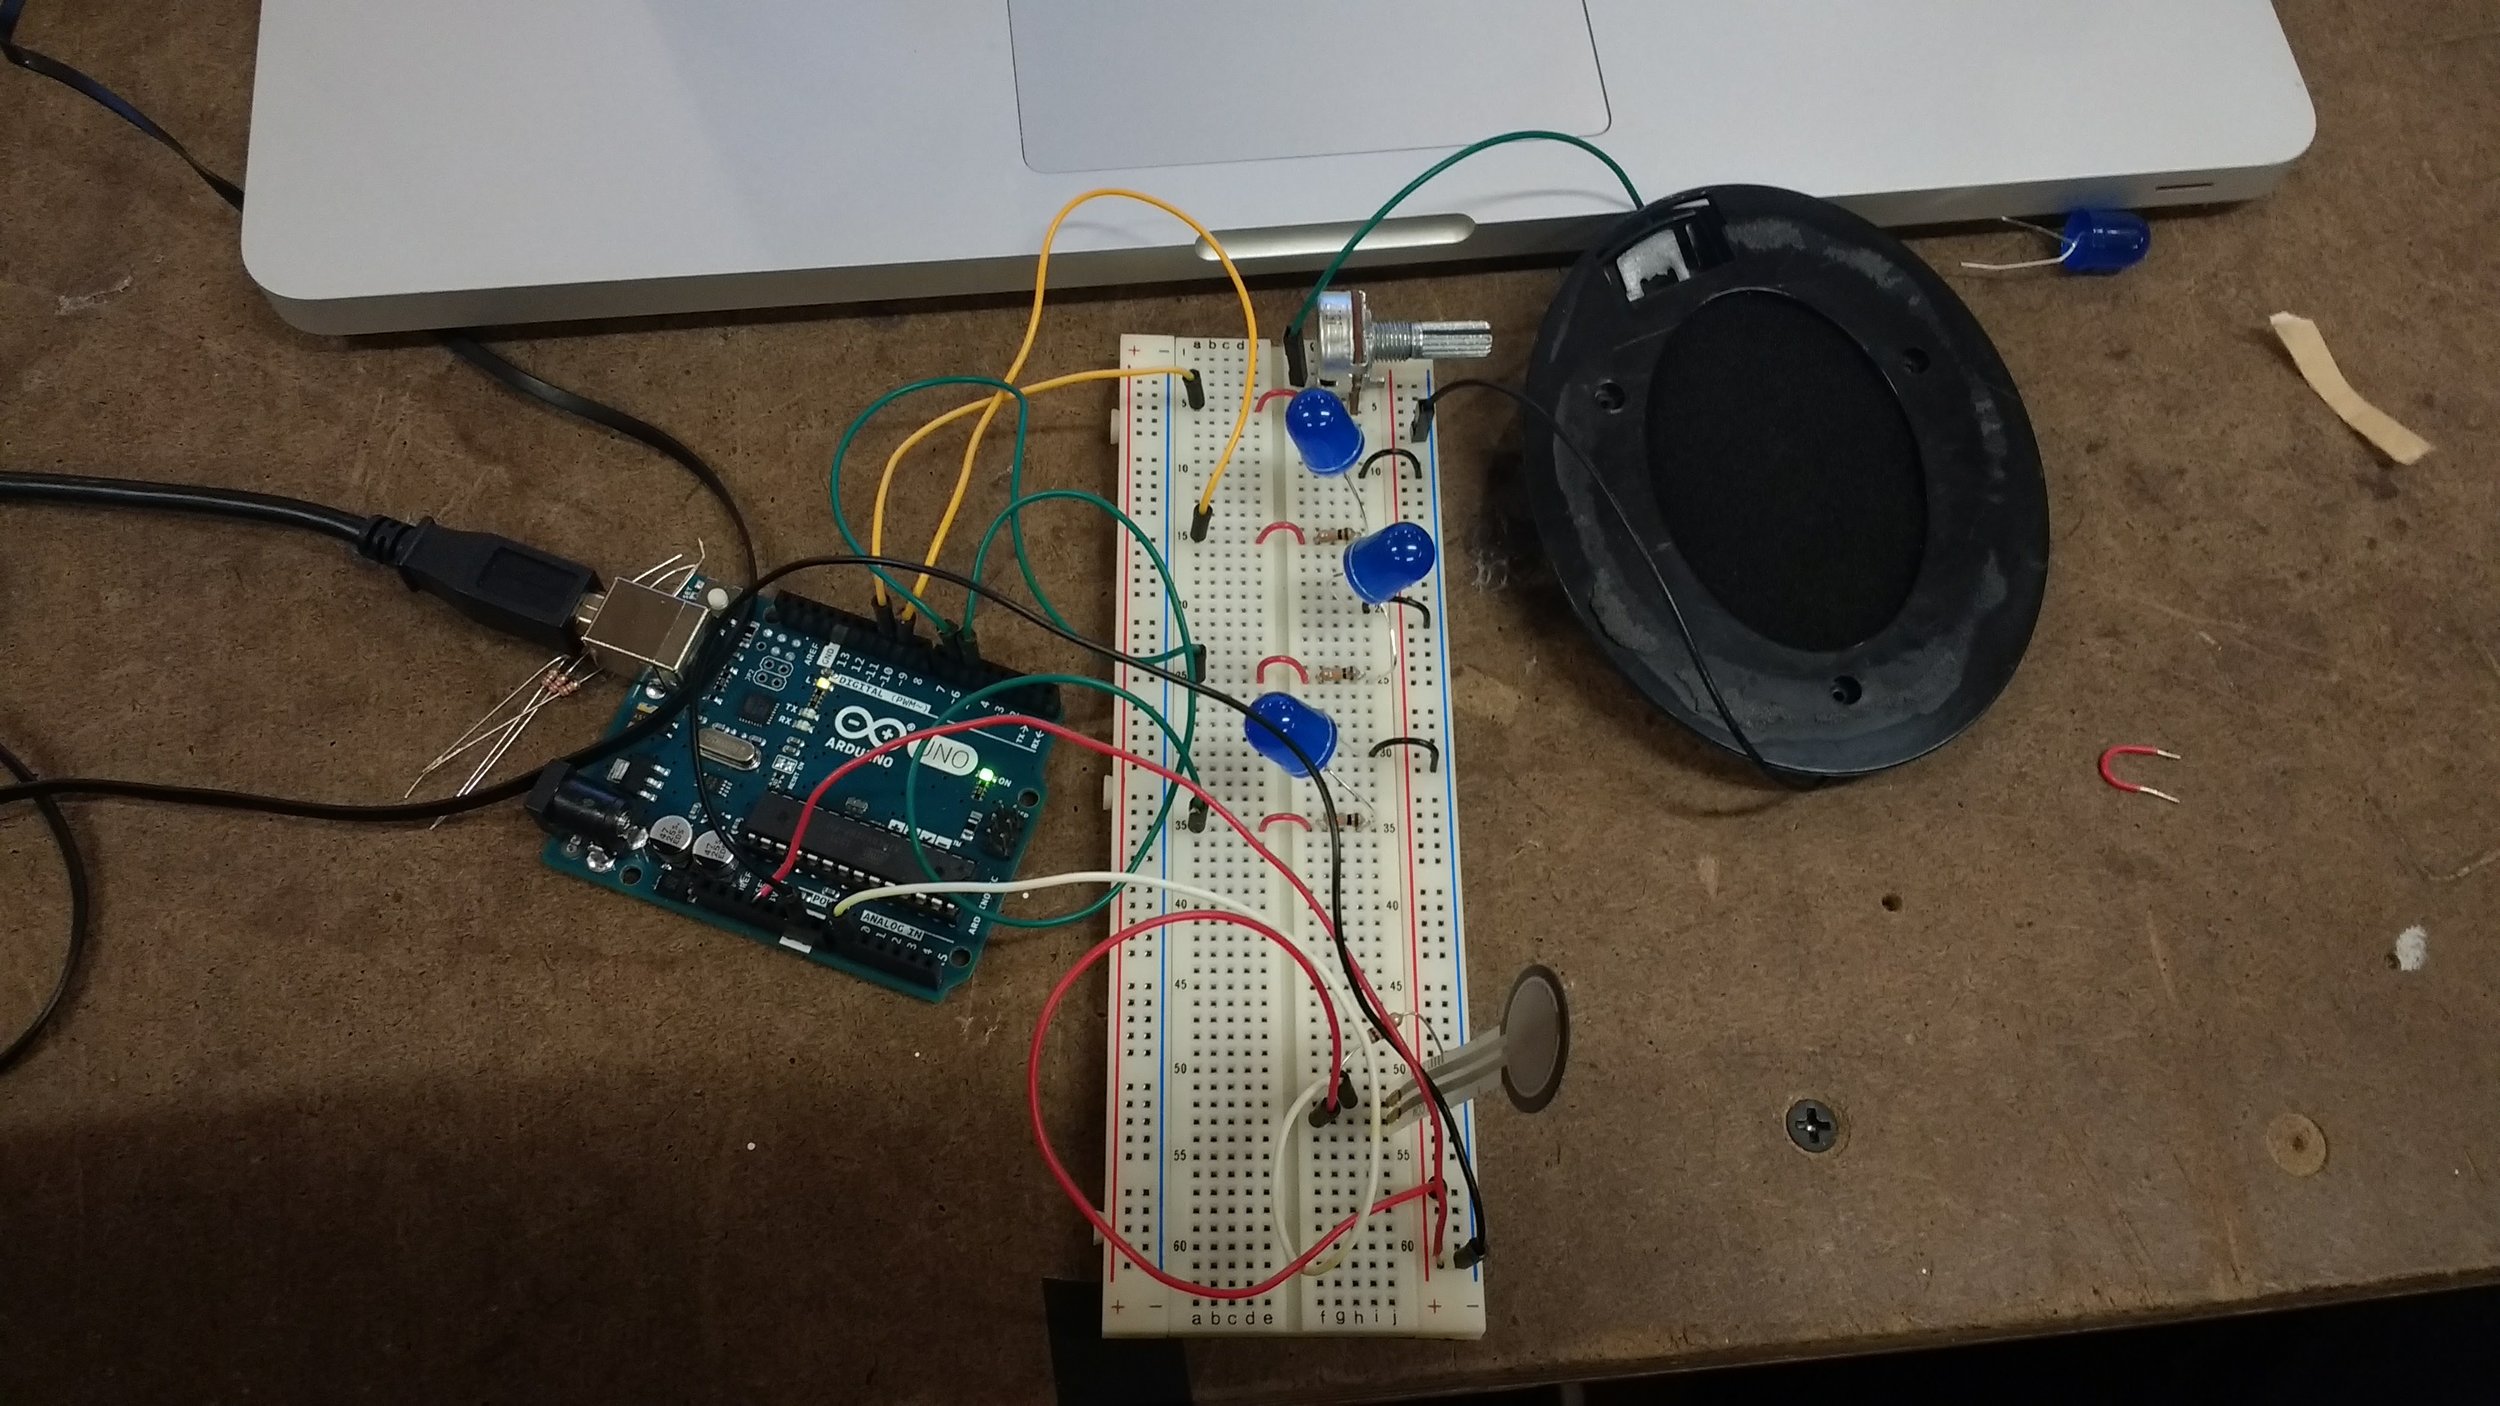
Setting up the project on a breadboard was surprisingly easy. It didn't take long for me to create the circuitry of what I wanted in my head. I used the FSR as an analog input, and several LEDs and a speaker for the analog output. As the user presses down harder and harder on the FSR, the brightness of the lights and the pitch of the sound coming from the speaker both get higher. This is to simulate the "charging" of the toy gun. And then depending on when the user lets go of the FSR, a "blast" sound will output. The type of sound depends on the number of LEDs that the user manages to light up.
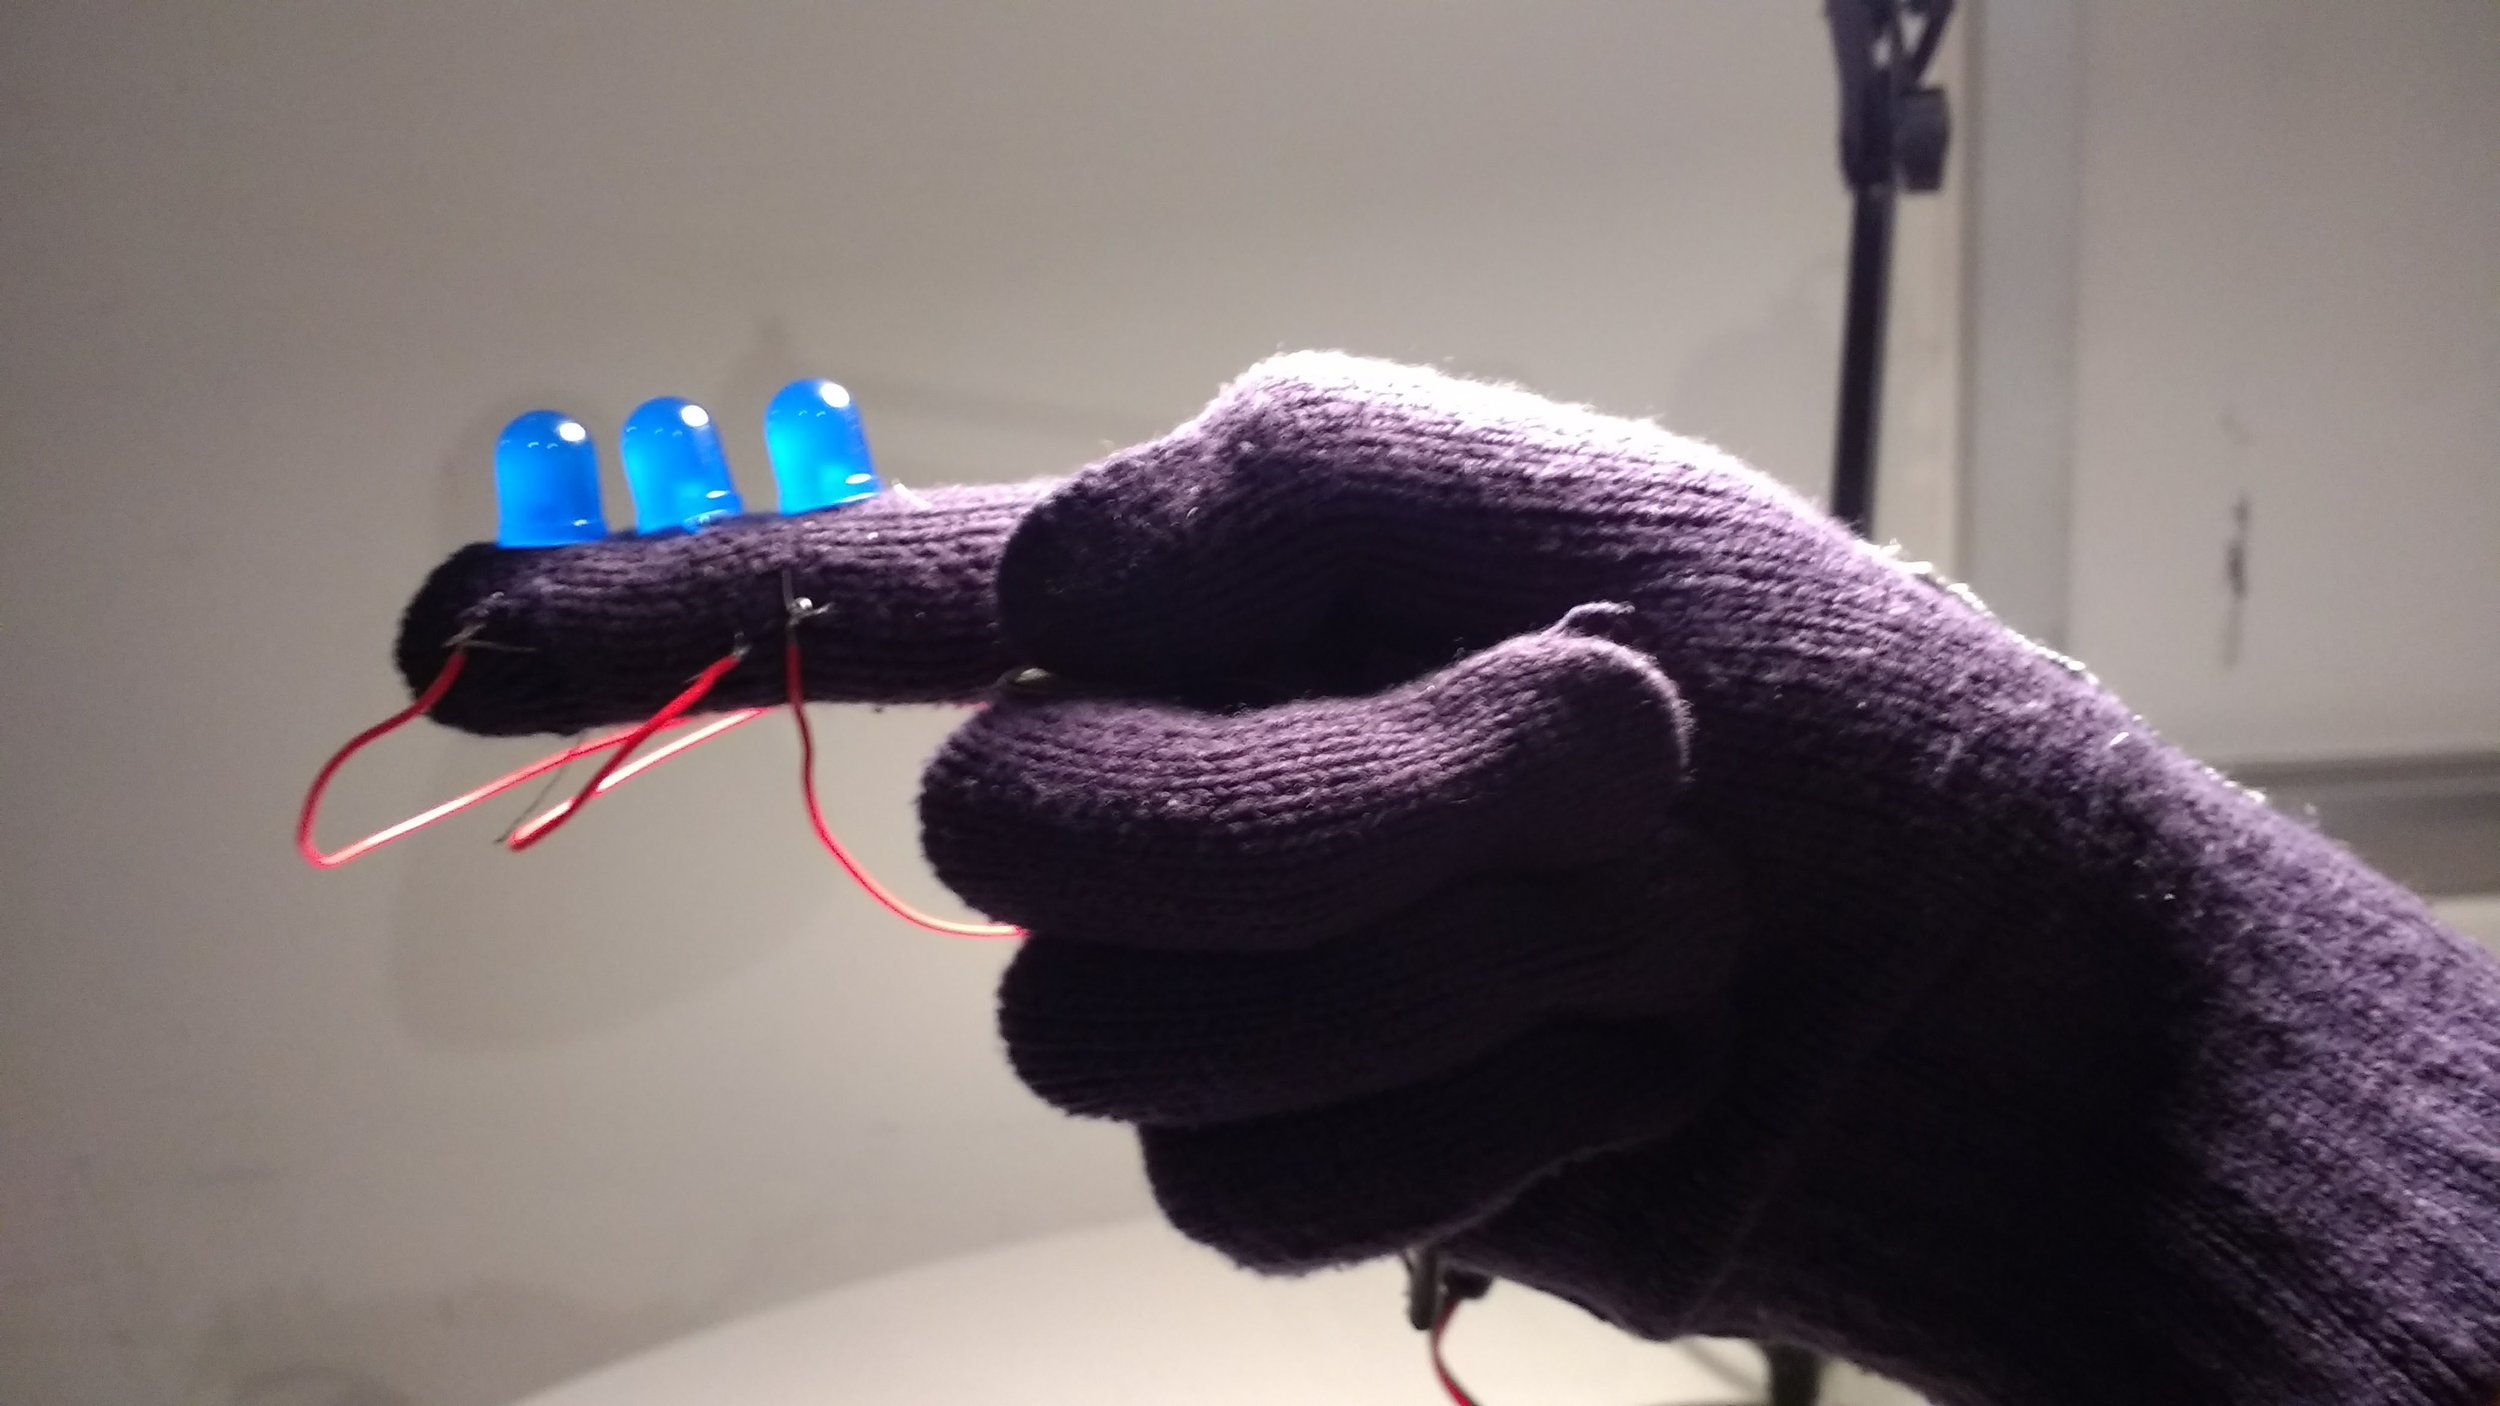
Now that all I had to do was "copy" what I had just done, except onto a glove. Now that I had a template, it was much easier to implement. I had to learn some new tricks, such as soldering wires to my FSR. I also used some conductive thread, which I didn't think was necessary, but thought what the heck. It took me a decent amount of time to connect it all, especially since I only one had for most of the time since my right hand was often used as a mannequin.
I definitely did not do everything as efficiently as I could have, but I think it was a good learning experience for me to kind of hack my way into getting what I wanted done. I'm sure to ask a little more help from my more experienced peers next time. I need to improve on how to present my prototypes a bit more aesthetically.
As for the Arduino code, it wasn't too complicated. I used some of the logic from my previous piano project to detect when the user has released the FSR. Other than that, the major difference was that I had to map the range of values needed for the brightness and frequency. I mapped the brightness to several ranges in order to get the LEDs to gradually increase in brightness one by one. Below is the code: